- LeadTools中文图像处理教程(1):更改数据格式 点击进入
- LeadTools中文图像处理教程(2):图像的几何变换 点击进入
- LeadTools中文图像处理教程(3):倾斜校正 点击进入
- LeadTools中文图像处理教程(4):调整图像亮度和对比度 点击进入
- LeadTools中文图像处理教程(5):图像去噪 点击进入
- LeadTools中文图像处理教程(6):检测和增强边缘、线条 点击进入
- LeadTools中文图像处理教程(7):应用艺术效果 点击进入
- LeadTools中文图像处理教程(8):调整色彩 点击进入
- LeadTools中文图像处理教程(9):添加图像至另一个图像 点击进入
- LeadTools中文图像处理教程(10):窗位(仅用于Medical) 点击进入
- LeadTools中文图像处理教程(11):对比图像 点击进入
在LeadTools中,您可以使用许多高级、低级的方法和类改变颜色分辨率(每像素的位数)。大多数图像处理方法在内存中操作图像,因此在文件中保存图像时这些更改是永久性的。一些低级的方法会操作您管理的缓冲区,例如在加载图像时处理数据。
本文概要:
1 创建“改变图像颜色分辨率”应用程序的具体步骤
2 创建“使用RasterUserMatchTable加速图像分辨率转换 ”应用程序的具体步骤
3 LeadTools自动颜色还原 的类介绍
4 LeadTools分辨率转换 相关类介绍
5 LeadTools支持自定义调色板抖动 的类介绍
6 LeadTools专门的分辨率 相关类介绍
7 LeadTools低级颜色分辨率 相关方法介绍
8 LeadTools颜色空间转换 相关类介绍
1 创建“改变图像颜色分辨率”应用程序的具体步骤
1. 打开Visual Studio .NET。点击 文件->新建->项目…。打开新建项目对话框后,在模板中选择“Visual C#”或“Visual Basic”,随后选择“Windows窗体应用程序”。在名称栏中输入项目名称 “SampleColorResolutionCommand”,并使用“浏览”按钮选择您工程的存储路径,点击“确定”。
2. 在“解决方案资源管理器”中,右击“引用”,选择“添加引用”。根据当前工程的 Framework 版本和生成目标平台,选择添加相应的LeadTools控件,例如工程中的版本为 Framework 4.0、生成目标平台是 x86,则浏览选择Leadtools For .NET文件夹” <LEADTOOLS_INSTALLDIR>\Bin\DotNet4\Win32”,选择以下的DLL“:
- Leadtools.dll
- Leadtools.Codecs.dll
- Leadtools.Codecs.Bmp.dll
- Leadtools.Codecs.Cmp.dll
- Leadtools.WinForms.dll
3.从工具箱(视图->工具箱),添加2个Button控件(将Button的Text属性分别改为“加载图像”和“将图像分辨率转为每像素8位”)。
4. 切换至Form1的代码视图(右击Form1,选择查看代码),将下面几行代码添加到文件开始处:
  1: using Leadtools;
  2: using Leadtools.Codecs;
  3: using Leadtools.Codecs.Cmp;
  4: using Leadtools.ImageProcessing;
  5: using Leadtools.WinForms;
5. 将以下变量添加至Form1类:
  1: private RasterImage image;
  2: private RasterImageViewer imageViewer;
  3: private RasterCodecs codecs;
6.双击“加载图像”按钮,在button1 Click事件句柄中添加以下代码:
  1: // 加载图像
  2: codecs = new RasterCodecs();
  3:
  4: codecs.ThrowExceptionsOnInvalidImages = true;
  5: image = codecs.Load(Path.Combine(Application.StartupPath, @"..\..\Pic\IMAGE1.cmp"));
  6:
  7: imageViewer = new RasterImageViewer();
  8: imageViewer.Image = image;
  9: imageViewer.Height = 1200;
 10: imageViewer.Width = 1000;
 11: imageViewer.Location = new System.Drawing.Point(0, 50);
 12: Controls.Add(imageViewer);
 13: imageViewer.BringToFront();
7.双击“将图像分辨率转为每像素8位”按钮,在button2 Click事件句柄中添加以下代码:
  1: if (image == null)
  2: {
  3:     MessageBox.Show("请首先加载图像!");
  4:     return;
  5: }
  6: // 将颜色分辨率转为每像素8位,在单独的图像中使用Netscape调色板
  7: ColorResolutionCommand cmd = new ColorResolutionCommand();
  8: cmd.Mode = ColorResolutionCommandMode.CreateDestinationImage;
  9: cmd.BitsPerPixel = 8;
 10: cmd.Order = RasterByteOrder.Rgb;
 11: cmd.DitheringMethod = RasterDitheringMethod.None;
 12: cmd.PaletteFlags = ColorResolutionCommandPaletteFlags.UsePalette;
 13: cmd.SetPalette(RasterPalette.Netscape());
 14: cmd.Run(image);
 15:
 16: RasterImage destImage = cmd.DestinationImage;
 17: System.Diagnostics.Contracts.Contract.Assert(destImage.BitsPerPixel == 8);
 18:
 19: imageViewer.Image = destImage;
 20: // 保存至磁盘
 21: codecs.Save(destImage, Path.Combine(Application.StartupPath, @"..\..\Pic\Image1_colorres8.bmp"), RasterImageFormat.Bmp, 8);
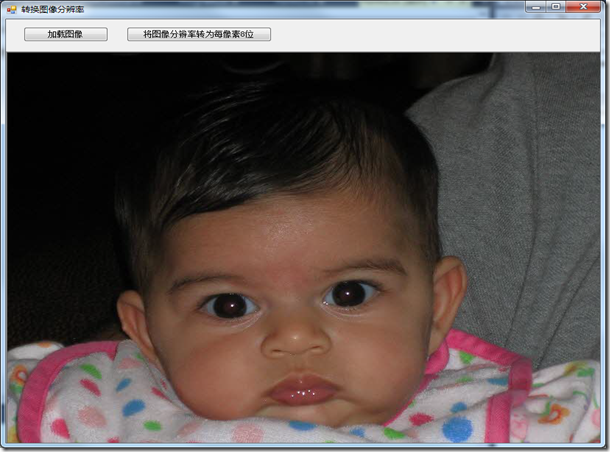
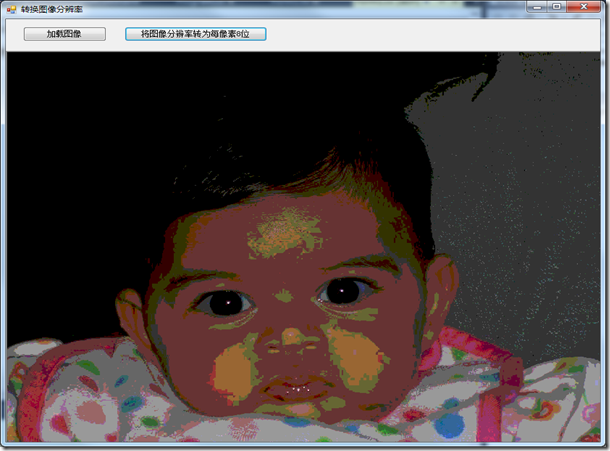
8.编译运行程序,本示例使用ColorResolutionCommand类改变图像分辨率,截图如下:
DEMO下载见博文尾部!
2 创建“使用RasterUserMatchTable加速图像分辨率转换 ”应用程序的具体步骤
1. 打开Visual Studio .NET。点击 文件->新建->项目…。打开新建项目对话框后,在模板中选择“Visual C#”或“Visual Basic”,随后选择“Windows窗体应用程序”。在名称栏中输入项目名称 “SampleRasterUserMatchTable”,并使用“浏览”按钮选择您工程的存储路径,点击“确定”。
2. 在“解决方案资源管理器”中,右击“引用”,选择“添加引用”。根据当前工程的 Framework 版本和生成目标平台,选择添加相应的LeadTools控件,例如工程中的版本为 Framework 4.0、生成目标平台是 x86,则浏览选择Leadtools For .NET文件夹” <LEADTOOLS_INSTALLDIR>\Bin\DotNet4\Win32”,选择以下的DLL“:
- Leadtools.dll
- Leadtools.Codecs.dll
- Leadtools.Codecs.Bmp.dll
- Leadtools.Codecs.Cmp.dll
- Leadtools.ImageProcessing.Core.dll
- Leadtools.WinForms.dll
3.从工具箱(视图->工具箱),添加2个Button控件(将Button的Text属性分别改为“加载图像”和“使用RasterUserMatchTable在改变图像分辨率时加快转换速度”)。
4. 切换至Form1的代码视图(右击Form1,选择查看代码),将下面几行代码添加到文件开始处:
  1: using Leadtools;
  2: using Leadtools.Codecs;
  3: using Leadtools.ImageProcessing;
  4: using Leadtools.ImageProcessing.Core;
  5: using Leadtools.WinForms;
5. 将以下变量添加至Form1类:
  1: private RasterImage image;
  2: private RasterImageViewer imageViewer;
  3: private RasterCodecs codecs;
6.双击button1,在button1 Click事件句柄中添加以下代码:
  1: // 加载图像
  2: codecs = new RasterCodecs();
  3:
  4: codecs.ThrowExceptionsOnInvalidImages = true;
  5: image = codecs.Load(Path.Combine(Application.StartupPath, @"..\..\Pic\IMAGE1.cmp"));
  6:
  7: imageViewer = new RasterImageViewer();
  8: imageViewer.Image = image;
  9: imageViewer.Height = 1200;
 10: imageViewer.Width = 1000;
 11: imageViewer.Location = new System.Drawing.Point(0, 50);
 12: Controls.Add(imageViewer);
 13: imageViewer.BringToFront();
7.双击button2,在button2 Click事件句柄中添加以下代码:
  1: if (image == null)
  2: {
  3:     MessageBox.Show("请首先加载图像!");
  4:     return;
  5: }
  6: RasterImage destImage = image.Clone();
  7: // 64色彩虹调色板
  8: RasterColor[] colors =
  9:        {
 10:           new RasterColor(0, 0, 0), new RasterColor(0, 0, 85), new RasterColor(0, 0, 170), new RasterColor(0, 0, 255),
 11:           new RasterColor(85, 0, 0), new RasterColor(85, 0, 85), new RasterColor(85, 0, 170), new RasterColor(85, 0, 255),
 12:           new RasterColor(170, 0, 0), new RasterColor(170, 0, 85), new RasterColor(170, 0, 170), new RasterColor(170, 0, 255),
 13:           new RasterColor(255, 0, 0), new RasterColor(255, 0, 85), new RasterColor(255, 0, 170), new RasterColor(255, 0, 255),
 14:           new RasterColor(0, 85, 0), new RasterColor(0, 85, 85), new RasterColor(0, 85, 170), new RasterColor(0, 85, 255),
 15:           new RasterColor(85, 85, 0), new RasterColor(85, 85, 85), new RasterColor(85, 85, 170), new RasterColor(85, 85, 255),
 16:           new RasterColor(170, 85, 0), new RasterColor(170, 85, 85), new RasterColor(170, 85, 170), new RasterColor(170, 85, 255),
 17:           new RasterColor(255, 85, 0), new RasterColor(255, 85, 85), new RasterColor(255, 85, 170), new RasterColor(255, 85, 255),
 18:           new RasterColor(0, 170, 0), new RasterColor(0, 170, 85), new RasterColor(0, 170, 170), new RasterColor(0, 170, 255),
 19:           new RasterColor(85, 170, 0), new RasterColor(85, 170, 85), new RasterColor(85, 170, 170), new RasterColor(85, 170, 255),
 20:           new RasterColor(170, 170, 0), new RasterColor(170, 170, 85), new RasterColor(170, 170, 170), new RasterColor(170, 170, 255),
 21:           new RasterColor(255, 170, 0), new RasterColor(255, 170, 85), new RasterColor(255, 170, 170), new RasterColor(255, 170, 255),
 22:           new RasterColor(0, 255, 0), new RasterColor(0, 255, 85), new RasterColor(0, 255, 170), new RasterColor(0, 255, 255),
 23:           new RasterColor(85, 255, 0), new RasterColor(85, 255, 85), new RasterColor(85, 255, 170), new RasterColor(85, 255, 255),
 24:           new RasterColor(170, 255, 0), new RasterColor(170, 255, 85), new RasterColor(170, 255, 170), new RasterColor(170, 255, 255),
 25:           new RasterColor(255, 255, 0), new RasterColor(255, 255, 85), new RasterColor(255, 255, 170), new RasterColor(255, 255, 255)
 26:        };
 27:
 28: // 创建和设置user match table
 29: RasterUserMatchTable userMatchTable = new RasterUserMatchTable();
 30: userMatchTable.Create(colors);
 31: userMatchTable.Use();
 32:
 33: // 使用新调色板更改颜色分辨率。注意若您多次使用,user match table 使您的代码速度更快。它的
 34: //代码在这里出现是因为我们想要向您展示它是怎么使用的。
 35:
 36: ColorResolutionCommand command = new ColorResolutionCommand(
 37:    ColorResolutionCommandMode.InPlace,
 38:    8,
 39:    RasterByteOrder.Rgb,
 40:    RasterDitheringMethod.FloydStein,
 41:    ColorResolutionCommandPaletteFlags.UsePalette | ColorResolutionCommandPaletteFlags.FastMatch,
 42:    colors);
 43: command.Run(destImage);
 44:
 45: //若您不再需要使用user match table,释放它
 46: userMatchTable.Unuse();
 47:
 48: imageViewer.Image = destImage;
 49: // 将图像保存回磁盘
 50: codecs.Save(destImage, Path.Combine(Application.StartupPath, @"..\..\Pic\result.bmp"), RasterImageFormat.Bmp, 8);
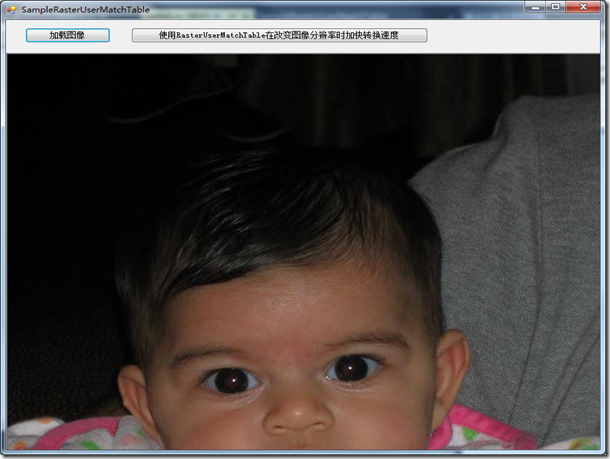
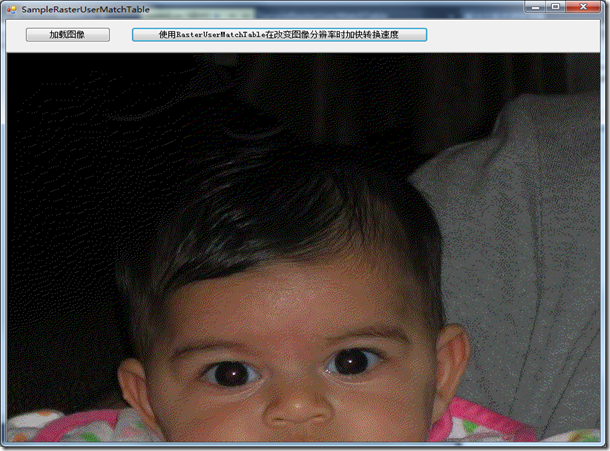
8. 编译运行程序,本示例使用RasterUserMatchTable加速图像分辨率转换的速度。结果如下图所示:
DEMO下载见博文尾部!
3. LeadTools自动颜色还原的类
|
Dithering method |
获取和设置默认的抖动方法,被一些内部的LEADTOOLS方法引用。 |
4. LeadTools主要颜色分辨率类
| ColorResolutionCommand 类 |
此类可以将一个图像转换为每像素任意位数。 可以设置输出路径、设定调色板。您可以直接转换原图或创建一个新的转换后图像。 在指定调色板时,您可以使用简单的调色板选项或设定一个符合您要求的自定义调色板。自定义调色板可设置为任意大小,它可以包括特定的颜色、保留的空白项和开放项。如果您想多次使用一些自定义调色板,可以使用RasterUserMatchTable创建一个表格优化性能。 |
5. LeadTools支持自定义调色板抖动的类
|
RasterUserMatchTable 类 |
使用RasterUserMatchTable类可创建一个预定义的表格,加快在ColorResolutionCommand中使用用户调色板此类情况的转换速度。 |
在使用时我们应该遵循以下的顺序:
- 创建一个RasterUserMatchTable类的新实例;
- 调用RasterUserMatchTable.Create方法创建表格;
- 调用RasterUserMatchTable.Use方法使表格可用。(将此方法设为一个单独的方法允许您可以在不重新创建此表格的情况下在文件中保存表格、获取您需要的一个表格)
- 将ColorResolutionCommand.PaletteFlags 属性设置为ColorResolutionCommandPaletteFlags.UsePalette 或ColorResolutionCommandPaletteFlags.FastMatch,运行ColorResolutionCommand。
- 若不再需要使用,调用Unuse方法。
6. LeadTools专门的分辨率类
|
类 |
说明 |
|
此方法自动在位图中使用二值分割。注意,此类只在Document/Medical工具包中可用。此方法能改进识别的结果(包括OCR、条码、OMR、ICR)。 但在某些图像的使用上有一些限制,详情请点击AutoBinarizeCommand查看帮助文档。 |
|
|
基于直方图统计分析的两峰值方法,可将二值分割应用于使用了一个自动计算阈值的图像。注意,此类也只在Document/Medical工具包中可用。 更多信息请点击AutoBinaryCommand查看帮助文档。 |
|
|
使用ChannelMixerCommandFactor类,可以重新分配一个特定图像的RGB值。用于颜色的调整和修正。 更多信息请点击ChannelMixerCommand查看帮助文档。 |
|
|
将图像转为灰度图像,并基于此类的属性扩展色彩成分。注意,此类只在Document工具包中可用。 更多信息请点击ConvertToColoredGrayCommand查看帮助文档。 |
|
|
通过将每个颜色的饱和度减少至0,将图像转换为灰度级。这个转换不会改变图像的颜色辨率。 更多信息请点击DesaturateCommand查看帮助文档。 |
|
|
通过使用每个像素的本地阈值,在不改变每像素位数的情况下将图像转为黑白图像。这个方法可用于条码识别的预处理,能够改进识别的结果。 更多信息请点击DynamicBinaryCommand查看帮助文档。 |
|
|
将一个1位、4位、8位、16位、24位或32位的图像转化为8位、12位或16位的灰度图像。在Document/Medical Imaging版本中仅支持12位和16位的灰度图像。 更多信息请点击GrayscaleCommand查看帮助文档。 |
|
|
通过将像素的原始值和新的颜色混合,或用新的颜色替换像素的原始值的方法,将灰度图像转换为彩色。此类在Raster Pro及以上的工具包可用。此方法的设计对象为灰度图像,如果图像不是灰度的,只能影响图像中红=绿=蓝的像素或区域。 更多信息请点击GrayScaleToDuotoneCommand查看帮助文档。 |
|
|
通过将像素的原始值和一种或多种新颜色混合,或用一种或多种新颜色替换像素原始值的方法,将灰度图像转换为彩色。此类在Raster Pro及以上的工具包可用。此方法的设计对象为灰度图像,如果图像不是灰度的,只能影响图像中红=绿=蓝的像素或区域。 更多信息请点击GrayScaleToMultitoneCommand查看帮助文档。 |
|
|
|
使用特定的循环模式,将1位、4位、8位、16位、24位或32位图像转换为半色调图像。半色调图像是1位的抖动图像,用于黑白打印或显示。 更多信息请点击HalfToneCommand查看帮助文档。 |
|
|
通过将样本颜色转换为目标颜色来校正颜色值。这个命令在Raster Pro及以上工具包中可用。 更多信息请点击SampleTargetCommand查看帮助文档。 |
|
|
分割图像,分割后的每段像素具有大致相同的颜色(颜色均匀)。这个命令在Raster Pro及以上工具包中可用。 更多信息请点击SegmentCommand查看帮助文档。 |
|
|
将一个12位或16位的灰度图像转换为8位灰度或24-位RGB图像。此类仅在Medical工具包中可用。 更多信息请点击WindowLevelCommand查看帮助文档。 |
7. LeadTools低级颜色分辨率的方法
|
方法 |
说明 |
|
Convert 方法 |
在指定的缓冲区中将数据转换为规定的每像素位数和颜色顺序。 |
|
DitherLine 方法 |
采用循环的方式,在输入缓冲区中以行的方式抖动,并将其写入一个输出缓冲区。 |
|
初始化一个图像的缓冲抖动。 |
|
|
清除StartDithering 和 DitherLine(Byte[],Int32,Byte[],Int32)方法中的所有数据变量和缓冲区。 |
8. LeadTools颜色空间的转换
Windows通常使用RGB颜色空间模型,在加载和保存文件时,如有需要,LEADTOOLS会将图像数据在RGB和其他颜色空间之间转换。此外,LEADTOOLS还为其他颜色空间模型提供了方法。您可以使用高级ColorSeparateCommand和ColorMergeCommand类创建和合并使用多种颜色空间模型的分色,包括RGB、CMYK、CMY、HSV和HLS。您也可以使用低级RasterColorSpace类在缓冲区中将原数据在不同的颜色空间之间转换,包括RGB、YUV、CMYK、CMY、YIQ、HSV、和 HLS。
注意:LEADTOOLS还支持TIFF CMYK文件的加载,且不需将数据转换为BGR。在使用了LoadCmykPlanes的图像中,我们将每一个单独的页面作为CMYK平面加载。若您想要将平面保存为TIFF CMYK,可以调用SaveCmykPlanes。
DEMO下载(此压缩文件包含本博文的两个示例程序):
本文Demo提供了更改图像分辨率的一个基本用例,若你想对图像进行更多的处理,欢迎下载LeadTools全功能试用版,并在本文的例子上进行修改。很简单的,你来试一试吧。
若您在使用LeadTools的过程中遇到任何问题,欢迎在葡萄城开发者社区LeadTools板块提问,我们的专业技术团队期待您的到来!



.K1AHo.png)


