Setting the Cell Types of the Register
In This Topic
To set cell types, for each custom cell type, you have to create a cell type object, set the properties for it, and then assign that object to the CellType property for a cell or range of cells.
- Set the cell type for the Check # column by adding the following code below the code you have already added:
Example
C# Copy Code// Create Check # column of number cells. FarPoint.Win.Spread.CellType.NumberCellType objNumCell = new FarPoint.Win.Spread.CellType.NumberCellType(); objNumCell.DecimalPlaces = 0; objNumCell.MinimumValue = 1; objNumCell.MaximumValue = 9999; objNumCell.ShowSeparator = false; fpSpread1.Sheets[0].Columns[0].CellType = objNumCell;
VB Copy Code' Create Check # column of number cells. Dim objNumCell As New FarPoint.Win.Spread.CellType.NumberCellType() objNumCell.DecimalPlaces = 0 objNumCell.MinimumValue = 1 objNumCell.MaximumValue = 9999 objNumCell.ShowSeparator = False fpSpread1.Sheets(0).Columns(0).CellType = objNumCell
- Set the cell type for the Date column by adding the following code below the code you have already added:
Example
C# Copy Code// Create Date column of date-time cells. FarPoint.Win.Spread.CellType.DateTimeCellType objDateCell = new FarPoint.Win.Spread.CellType.DateTimeCellType(); objDateCell.DateTimeFormat = FarPoint.Win.Spread.CellType.DateTimeFormat.ShortDate; fpSpread1.Sheets[0].Columns[1].CellType = objDateCell;
VB Copy Code' Create Date column of date-time cells. Dim objDateCell As New FarPoint.Win.Spread.CellType.DateTimeCellType() objDateCell.DateTimeFormat = FarPoint.Win.Spread.CellType.DateTimeFormat.ShortDate fpSpread1.Sheets(0).Columns(1).CellType = objDateCell
- Set the cell type for the Description column by adding the following code below the code you have already added:
Example
C# Copy Code// Create Description column of text cells. FarPoint.Win.Spread.CellType.TextCellType objTextCell = new FarPoint.Win.Spread.CellType.TextCellType(); objTextCell.MaxLength = 100; fpSpread1.Sheets[0].Columns[2].CellType = objTextCell;
VB Copy Code' Create Description column of text cells. Dim objTextCell As New FarPoint.Win.Spread.CellType.TextCellType() objTextCell.MaxLength = 100 fpSpread1.Sheets(0).Columns(2).CellType = objTextCell
- Set the cell type for the Tax? and Cleared? columns by adding the following code below the code you have already added:
Example
C# Copy Code/// Create Tax? and Cleared? columns of check box cells. FarPoint.Win.Spread.CellType.CheckBoxCellType objCheckCell = new FarPoint.Win.Spread.CellType.CheckBoxCellType(); objCheckCell.ThreeState = false; fpSpread1.Sheets[0].Columns[3].CellType = objCheckCell; fpSpread1.Sheets[0].Columns[4].CellType = objCheckCell;
VB Copy Code' Create Tax? and Cleared? columns of check box cells. Dim objCheckCell As New FarPoint.Win.Spread.CellType.CheckBoxCellType() objCheckCell.ThreeState = False fpSpread1.Sheets(0).Columns(3).CellType = objCheckCell fpSpread1.Sheets(0).Columns(4).CellType = objCheckCell
- Set the cell type for the Debit, Credit, and Balance columns by adding the following code below the code you have already added:
Example
C# Copy Code// Create the Debit, Credit, and Balance columns of currency cells. FarPoint.Win.Spread.CellType.CurrencyCellType objCurrCell = new FarPoint.Win.Spread.CellType.CurrencyCellType(); objCurrCell.LeadingZero = FarPoint.Win.Spread.CellType.LeadingZero.Yes; objCurrCell.NegativeRed = true; objCurrCell.FixedPoint = true; fpSpread1.Sheets[0].Columns[5].CellType = objCurrCell; fpSpread1.Sheets[0].Columns[6].CellType = objCurrCell; fpSpread1.Sheets[0].Columns[7].CellType = objCurrCell;
VB Copy Code' Create the Debit, Credit, and Balance columns of currency cells. Dim objCurrCell As New FarPoint.Win.Spread.CellType.CurrencyCellType() objCurrCell.LeadingZero = FarPoint.Win.Spread.CellType.LeadingZero.Yes objCurrCell.NegativeRed = True objCurrCell.FixedPoint = True fpSpread1.Sheets(0).Columns(5).CellType = objCurrCell fpSpread1.Sheets(0).Columns(6).CellType = objCurrCell fpSpread1.Sheets(0).Columns(7).CellType = objCurrCell
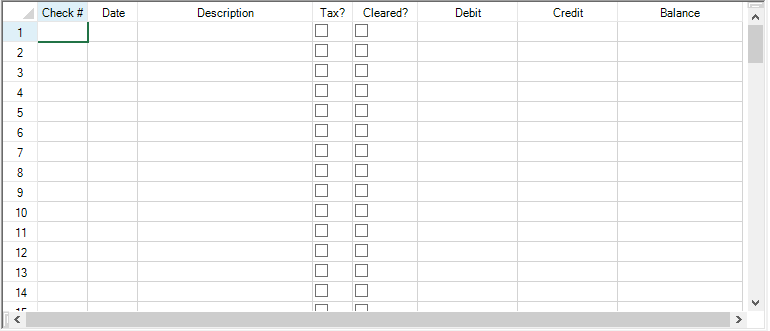
- Save your project, then click the Start button in the toolbar to run your project.
- Your form should look similar to the following picture.
Go to Adding Formulas to Calculate Balances to continue the tutorial.